|
|
|
Who's Online
There currently are 5823 guests online. |
|
Categories
|
|
Information
|
|
Featured Product
|
|
|
 |
|
|
There are currently no product reviews.
 ;
I have this hi-fi system for a long time and I need to repair some things. Founding this manual will be very helpfull :)
 ;
It is pretty good. The schematics were covered all components, the manual also provide the parts list . It's useful for the trouble shooting.
 ;
Very fast service, best quality of the service manual and the schematics
 ;
This service manual of the old video cassette recorder VT-LC50EM is very good readable even the tiniest numbers (i.e. IC-pins). The circuits are very clear. Many details of the schematic are very good described but in GERMAN language. Many schematic details - but complete at all. Common background information of several details are enclosed and physical knowledge of the TFT liquid crystal display for example. The manual lacks PCB drawings. If you understand german I would recommend this manual for you.
 ;
Hi, this is a very clear manual, nice copy, not quite up to the standard of the very best available but better than many others. I think the price was especially fair for a hard to find manual and I would certainly use this manual seller again. Recommended.
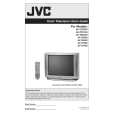
AV-20D304
2.2 DISASSEMBLY PROCEDURE 2.2.1 REMOVING THE REAR COVER (1) Unplug the power plug. (2) As shown in the Fig.1, remove the 9 screws [A]. (3) As shown in Fig.1, remove the 4 screws [B]. (4) Then remove the REAR COVER toward you. 2.2.4 CHECKING THE PW BOARD � Remove the REAR COVER. (1) Pull out the MAIN CHASSIS (refer to REMOVING THE MAIN PWB). (2) Erect the MAIN CHASSIS vertically so that you can easily check the backside of the PW Board. CAUTION: � When erecting the chassis, be careful so that there will be no contacting with other PW Board. � Before turning on power, make sure that the wire connector is properly connected. � When conducting a check with power supplied, be sure to confirm that the CRT EARTH WIRE (BRAIDED ASS�Y) is onnected to the CRT SOCKET PW board. 2.2.3 REMOVING THE SPEAKER � Remove the REAR COVER. (1) As shown in Fig.1, remove the 4 screws [D], then remove the speaker. (2) Follow the same steps when remove the other hand speaker. NOTE: When removing the 4 screws [D] of the speaker, remove the lower side screw first, and then remove the upper one. 2.2.5 WIRE CLAMPING AND CABLE TYING (1) Be sure to clamp the wire. (2) Never remove the cable tie used for tying the wires together. Should it be inadvertently removed, be sure to tie the wires with a new cable tie.
2.2.2 REMOVING THE MAIN PWB � Remove the REAR COVER. (1) Raise the backside of the MAIN PWB, and remove the PWB STOPPER [C] from the cabinet. (2) Withdraw the MAIN PWB backward. (If necessary, remove the wire clamp, connectors etc.)
(No.52103)1-5
 $4.99 AV20D304 JVC
Owner's Manual Complete owner's manual in digital format. The manual will be available for download as PDF file aft…
|
|
 |
> |
|
