|
|
|
Who's Online
There currently are 5762 guests online. |
|
Categories
|
|
Information
|
|
Featured Product
|
|
|
 |
|
|
There are currently no product reviews.
 ;
Fantastic quality and impressive delivery time. Based on this manual, I recommend this service without hesitation! Five Stars for certain.
 ;
Was happy to find the complete owners manual... It's all in there, just like the original...
 ;
Thanks for offering this item at such a good price. Proved handy in identifying the part I was looking for my set.
 ;
Thr Video Recorder i have is quiet Old and the Producer could Not help me. So i w as very glad to find an offer for the owners Manual for a very fair Price.a I obtained the original Manual very quick and I am happy to have it now.
 ;
The PDF copy was immediately available on download after the payment. However, I noticed that the document was in German, and Ihad to contact a German translator to get it translated it to English. The quality of document is legible can be used for my purpose.
WALL-MOUNTING
Important Safety Note: The customer is solely responsible for proper selection of mounting hardware not included with the speakers, and for proper assembly and installation of the wall brackets, including but not limited to the selection of appropriate weight-bearing supports and proper use of the bracket. JBL disclaims any liability for the selection of mounting hardware and/or bracket installation. Be sure to follow these bracket assembly and installation instructions carefully. If you have any questions or doubts about your ability to correctly wall-mount the speakers, consult with your authorized JBL dealer or custom installer. Prepare the speaker wire as described on page 8, keeping the (+) conductor to the left and the (�) conductor to the right as you face the wall.
Mount the attachment plate into a wood stud on the wall, using three #10 panhead wood screws at least one inch long (not supplied). Make sure that all three screws are driven into the stud and not into drywall. If the bracket needs to be mounted in drywall, the customer is responsible for selecting and using appropriate wall anchors and screws. Making sure to preserve the proper polarity (+ and � connections), use the supplied terminal
wrench to loosen the red collar of the binding post until the pass-through hole underneath it is revealed. Insert the bare end of the positive wire through the hole, then screw the collar down until it is tight. Follow the same procedure to connect the negative wire to its terminal. Carefully lower the speaker onto the bracket so that the mounting bracket on the satellite â� â� slides over the wall attachment plate until the metal spring clip engages in the square hole in bracket part B.
â� â� Shown without speaker
attached to bolts.
ATTACHING THE CRADLE TO THE CENTER SPEAKER
Important Safety Notes: � The CVCEN50 cradle is only intended for use with the CVCEN50 speaker. Attempting to use the cradle with any other model speaker is unsafe and may result in personal injury and damage to the equipment. � The cradle must be placed in a safe location, protected from young children and pets who might topple it, possibly resulting in serious
injury. Never place the cradle so that any part of it is sticking out over the edge of the table, shelf or other surface underneath it. � If you intend to install the CVCEN50 speaker on top of the JBL Cinema Vision plasma television, do not use the cradle. Instead, place it on the plasma screen�s table stand, or, if the screen is mounted on the wall, mount the
CVCEN50 on the wall above or below the screen. Lower the CVCEN50 speaker onto the cradle so that it rests in the curved pedestal. The metal clip should fit over the tab at the top of the cradle.
7
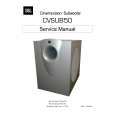
 $4.99 CVSUB50 JBL
Service Manual Complete service manual in digital format (PDF File). Service manuals usually contains circuit diagr…
|
|
 |
> |
|
