|
|
|
Who's Online
There currently are 5820 guests online. |
|
Categories
|
|
Information
|
|
Featured Product
|
|
|
 |
|
|
There are currently no product reviews.
 ;
Bought T4850 High End Tuner a few years ago, but i didn't know where all the buttons were used for. So i purchased the owners manual. Perfect! Just what i needed.
;
Bought the used Philips car-radio. No manual! Found on this site a copy of the orginal English manual. I am very happy with it. Now I know how to setup and use my "new" car-radio.
Recommended site for everybody looking for a manual for (older) products!
;
Great deal, you are the only one on earth who could deliver this old manual. Thx so much and have nice chrismas
 ;
Everything is OK. Owner's Manual I downloaded ( I get link for it by email).
;
The only reason I gave this less than 4 stars, is because it shouldn't take 24 hrs to have the download available. I was surprised to find that I had to wait until the next day to be able to download the manual that I paid for.
The manual itself is the correct manual.
f To protect other images, repeat Step 5. g Press MENU.
The menu appears.
For the Index (three images) screen a Set the mode dial to , press the zoom W button twice to switch to the Index (three images) screen. b Move the image you want to protect to the center using b/ B. c Press MENU.
The menu appears
To release protection
In Step 4, select the image from which you want to release protection, and press the center z. To release protection from all of your images, repeat this process for each of them.
h Select [OK] using the B, then press the center z.
The selected image is protected.
To cancel the protection
Select [CANCEL] in Step 4 or select [EXIT] in Step 8.
To release protection
In Step 5, using v/V/b/B, select an image for which you want to release protection, and press the center z. Repeat this operation for all the images for which you want to release protection. Then, press MENU, select [OK], and press the center z.
d Select [PROTECT] using v/V, then press the center z.
The center image is protected, and a - (Protect) mark is placed on that image.
PRINT PROTECT
Still image editing
To protect all your images
In Step 4, select [ALL], then press the center z. Next, select [ON], then press the center z.
� OK
100-0005
DELETE
2002 7 4 10:30PM
To release all protection
In Step 4, select [ALL], and press the center z. Then select [OFF], and press the center z.
e To protect other images, move the image you want to protect to the center using b/B, and repeat Step 4.
67
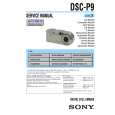 $4.99 DSCP9 SONY
Service Manual Complete service manual in digital format (PDF File). Service manuals usually contains circuit diagr…
|
|
|
> |
|


