|
|
|
Categories
|
|
Information
|
|
Featured Product
|
|
|
 |
|
|
There are currently no product reviews.
 ;
Very well done!!!!! congratulations. It was a bit longer than usual the wiating time even if it was on time (in 24 hours).
;
Last week I bought a second hand BAUKNECHT TRK4850 DRYER. It is a professional machine with many programs and switch options. I feared it would be a huge quest to find a manual. I was delighted when I found owner-manuals.com. After payment I received the file to download the next day already. The quality is great. I am very happy. Thanks!
but kindly the distributions of the operating programs not find in the owners manual,can you help me to understand the operating programs instructions thank you
;
Very good copy, very readable and easy transaction as always.
;
It is perfect, exactly what we needed. It's like the paper version but less clutter.
 ;
Received my manual within 24 hours. Very clear scan of the manual I needed. Thanks!
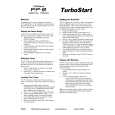
Chapter 1 Playing the Keyboard
Adding a Variety Effects to the Sound
In addition to reverb, you can apply a variety of changes to the FP-2�s sounds. These are referred to as �effects.� With the FP-2, you can select from ten different effect types. With the factory default settings, effects have been preselected for each tone.
fig.01-19
NOTE
Effects may not be applied with some of sounds.
1,2
1. 2.
Press the [Effects] button, getting its indicator to light.
Try fingering the keyboard. The effect is applied to the currently selected tone.
Some tones initially have effect applied. Selecting such a tone makes the [Effects] button�s indicator light up automatically.
To remove the effect, press the [Effects] button once more, extinguishing the indicator.
â� Changing the Depth of Effect
You can select from ten levels of depth for the effect.
You can specify which part is to have priority when the effects assigned to the Upper Tone and the Lower Tone differ. Refer to �Setting the Part to Which Effects Are Added� (p. 41).
1.
Hold down the [Effects] button and press the [-] or [+] button.
The depth for the effect being applied to the currently selected tone appears in the display.
NOTE
You cannot change the levels of depth for the rotary effect.
While holding down...
Press
The next time you choose the same tone, the effect with the depth you�ve selected here is applied.
You can change the effect type. Refer to �Changing the Effect Type� (p. 40).
22
 $4.99 FP-2 ROLAND
Quick Start Quick start guide ( sometimes called quick guide ) contains most important information on how to use…
|
|
|
> |
|
|
Parse Time: 0.164 - Number of Queries: 100 - Query Time: 0.033