|
|
|
Who's Online
There currently are 6043 guests online. |
|
Categories
|
|
Information
|
|
Featured Product
|
|
|
 |
|
|
There are currently no product reviews.
 ;
Thank´s for your help, I already recived these manual from you
;
Thank you for your manual It has the basic things to and i use the Oszi for Longer Time.
THX
;
Actually, I was looking for this information for 3 years!...now thanks to you, the manual is on my hands and of great help, cause I understand now where I was doing wrong connections and wires...excellent, I'll be back to you if in need, thank you.
 ;
This manual covers the main equipment features only. While it also includes the procedure for saving and loading from the now long obsolete memory cards it does not mention the how to operate with the optional floppy drive interface so I am still at a loss about how to use this! Note that there is a separate manual covering the MIDI interface and programming via the keyboard, not included in this download. You will also need to get hold of this if you want to use the MIDI interface properly. Basically there is little difference between this manual and the free to download manual for the similar PR60 model.
;
Good list of manuals. I found a very rare one and easily get. Should be promptly to download, as we must to wait hours even after confirmed payment.
EN
45
To change the settings
You can change the Parental lock settings later.
To temporarily release the Parental Lock
When you set the parental level strictly, some discs may not be played back at all. When you insert such a disc and try to play it back, the following Parental Lock screen appears on the TV screen, asking you whether you want the Parental Lock to be temporarily released or not.
A
Access the Parental Lock screen.
A Press SET UP MENU. B Press w e to select � OTHERS�. C Press rt repeatedly to move H to �PARENTAL LOCK�, then press OK.
� The �PARENTAL LOCK� sub-menu appears on the TV screen. � You can only move H to �PASSWORD� or to �EXIT� before you enter your password.
A Access the password screen.
A Place the disc in the disc tray.
� If the disc rated higher than the selected set level, the following screen appears.
PARENTAL LOCK TEMPORARY RELEASE NOT RELEASE PASSWORD ____
B Enter the password.
Press the appropriate number keys to enter a 4-digit password, then press OK. If you enter the wrong password, �WRONG! RETRY...� appears at the bottom of the TV screen. Enter the correct password.
PARENTAL LOCK COUNTRY CODE PASSWORD EXIT GB 4 ____ SET LEVEL
NEW PASSWORD? ��� PRESS 0 ~ 9 KEY TO EXIT, PRESS [SET UP MENU].
B Press rt to move H to �TEMPORARY RELEASE�, then press OK.
SELECT OK
PASSWORD? ��� PRESS 0 ~ 9 KEY
� If you select �NOT RELEASE�, you cannot play back that disc.
SELECT OK
B Enter the password.
Press the appropriate number keys to enter a 4-digit password, then press OK.
� If you enter the wrong password, �WRONG! RETRY...� appears on the TV screen. Enter the correct password. � If you enter the correct password, the Parental lock is released and the unit starts playback.
C Change the country code.
Press rt to select the country code, then press OK.
� See �Country/Area Code List for Parental Lock� ( pg. 46). � When you change the country code, you must select the set level.
NOTES:
� When you enter the wrong password more than 3 times in step B above, the arrow moves to �NOT RELEASE� automatically and rt do not work. In such a case, press OK, then press x to remove the disc. � If you forget your password, enter �8888� in step B.
D Change the set level.
Press rt to select the desired level, then press OK.
E Enter your new password.
Press the appropriate number keys to enter a 4-digit password, then press OK.
� The password entered in this step becomes the new password. If you do not change the password, enter the same password as in the step B. � Even if you want to change only the country code and/or set level, do not forget to enter the password after changing the country code and/or the set level. Otherwise, the new country code and/or the set level will not become effective.
F Return to the normal screen.
Press SET UP MENU.
NOTES:
� When you enter the wrong password more than 3 times in step B above, the arrow moves to �EXIT� automatically and rt do not work. � If you forget your password, enter �8888� in step B.
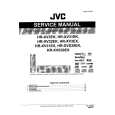 $4.99 HRXV3EK JVC
Service Manual Complete service manual in digital format (PDF File). Service manuals usually contains circuit diagr…
|
|
|
> |
|