|
|
|
Categories
|
|
Information
|
|
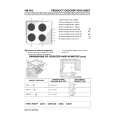
Featured Product
|
|
|
 |
|
|
There are currently no product reviews.
 ;
This schema available for me in good condition. I would highly recommend.
;
Thanks for this "hard to find" service manual.
I apreciate the good quality of scanning and the pages scanned in A3 format.
;
Helpd me mont a new carradio when prewius mont was a mess.
;
Very good service and quick service, very good quality of service manual!
;
Great tape deck manual!
I'm very positively surprised, because it is a very long manual, lot of pages, drawings, diagrams, description of how to make the alignment and adjustment procedures.
It is as good as the old "Naka" manuals from the 1970's - if somebody have seen them, they know what I mean by that.
I recommend to buy this very much !
KV-G14K3/G21K3
2-6. PICTURE TUBE REMOVAL
(1) For KV-G14K3
a
3 C board 2 A board
b b
RM-870
a
4 Deflection yoke 5 Four screws (Tapping screws)
1 Turn up one side of the rubber cap in the direction indicated by the arrow a. 2 Using a thumb pull up the rubber cap firmly in the direction indicated by the arrow b.
1 Anode cap
c
Cushion
� 12 �
(2) For KV-G21K3
Anode button
3 When one side of the rubber cap is separated from the anode button, the anode-cap can be removed by turning up the rubber cap and pulling it up in the direction of the arrow c.
3 C board 4 Deflection yoke 2 A board 5 Four screws (Tapping screws)
�
HOW TO HANDLE AN ANODE-CAP
1 Anode cap
1 Do not damage the surface of anode-caps with sharp shaped objects. 2 Do not press the rubber too hard so as not to damage the inside of anode-caps. A metal fitting called the shatter-hook terminal is built into the rubber. 3 Do not turn the foot of rubber over too hard. The shatter-hook terminal will stick out or damage the rubber.
Cushion
|
|
|
> |
|
|
Parse Time: 0.155 - Number of Queries: 126 - Query Time: 0.033