|
|
|
Categories
|
|
Information
|
|
Featured Product
|
|
|
 |
|
|
There are currently no product reviews.
 ;
It was easy to order and received exactly what I needed. Only complaint would be the 24 hours you have to wait.
 ;
Manual was delivered in a timely manner and was all in English as advertised. The manuals I received when we moved into our flat were in German, Italian, and French. Having never used a steamer before, and not speaking/reading German very well, I needed an English Manual. this was a huge help.
;
Great Manual. This manual is available no where else. It was exactly what I was looking for. Only in German.
;
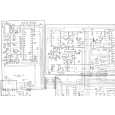
This GRUNDIG UV5A Owner Manual is not only an instruction manual but a total functional circuit description of the Multimeter and includes circuit diagram at the end pages. It is very helpful for repairing and calibrating the instrument. It is written in two languages English and German for international support. It was very easy to repair my unit with this document. Regards, Regis Pauly, Electrical Engineer.
;
The owner's manual was evetything I thought it would be. I was able to print it out using both sides of the paper in quick order, saving me a search online for a used one.
Using the Timers English
Using the Unit You can set the time in the same way as for setting the Daily Timer. When the timer ON-time comes: � When the timer ON-time comes, the System automatically turns on. The station you have set is played. The Timer indicator ( ) blinks during timer operation. To stop timer recording, press the 7 button. � When the timer OFF-time comes, the System automatically turns off.
1 2
Insert a blank or erasable tape into the Deck B and wind past the tape leader. Press the CLOCK/TIMER button until �ON TIME� immediately after �REC TU� appears on the display.
Each time you press the button, the display changes as follows: DAILY = ON TIME = REC TU = ON TIME* = Clock setting display = Canceled = (back to the beginning)
*: This item should be selected for the REC Timer setting.
� If the System is already on when the timer ON-time comes, the REC Timer does not work.
Turning the REC (Recording) Timer On and Off
Once you have set the REC Timer to record a source, the timer setting is stored in memory. So, though the REC Timer turns off once it is used, you can recall it at any time. To cancel the REC Timer temporarily:
Then, the System enters ON-time setting mode. The current ON time appears on the display and the hour digits, �REC� indicator and the timer indicator ( ) blink.
1 2
Press the CLOCK/TIMER button on the Unit repeatedly until �REC TU� appears on the display. Press the CANCEL button on the Unit.
�CANCEL� appears and both the Timer indicator ( �REC� indicator go out. ) and the
To activate the cancelled REC Timer:
3
Setting the ON time you want the System to turn on.
1. Press the 4 or ¢ button to set the hour, then press the SET button. 2. Press the 4 or ¢ button to set the minute, then press the SET button. �OFF TIME� appears and then the System enters OFF-time setting mode. The current OFF time appears on the display, and the hour digits blink.
1
Press the CLOCK/TIMER button on the Unit repeatedly until �REC TU� appears on the display.
The Timer indicator ( the display. ) and the �REC� indicator blink on
2
Press the SET button on the Unit.
�SET OK� appears on the display. The Timer indicator ( ) and the �REC� indicator remain lit, and the display returns to the original display.
4
Setting the OFF time you want the System to turn off.
1. Press the 4 or ¢ button to set the hour, then press the SET button. 2. Press the 4 or ¢ button to set the minute, then press the SET button. The System enters Preset Station Entering mode.
� If the System is unplugged, or a power failure occurs, the timer setting will be lost in a few days. You will need to reset the clock first, then the timer.
5
Select the preset station for recording.
1. Press the 4 or ¢ button to set the band (TUNER FM or TUNER AM), then press the SET button. 2. Press the 4 or ¢ button to set the preset number, then press the SET button. �SET OK� appears on the display. The �REC� indicator stops blinking and remains lit.
6
Press the STANDBY/ON button to turn off the System, if necessary.
To confirm / change the timer setting, repeat the setting procedure from the beginning.
23
|
|
|
> |
|