Fast Download,all pages present,an excellent copy.THis enabled to find the origional part numbers and chase them up. The cartridge is proving difficult to find but at least I know the origional part number.Thanks to all.
Very good manual, in depth and complete. Only criticism is that some of the circuit diagrams are slightly blurry and hard to follow for long periods of time, but this is to be expected. Perfect for any maintenance required. Also contains the wiring diagrams of the control cable for constructing extensions.
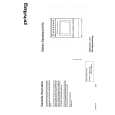
Text excerpt from page 73 (click to view)
CHAPTER 3. REPAIR INSTRUCTION
4
1. Place the camera so that lens is set against the light source surface of the Brightness Box via the C-12 Filter. 2. Set the Brightness Box to EV12. 3. Click the �Check� button. 4. Check the Brightness level if it is within 0 ± 5. * If not, calibrate the Brightness Box until it becomes within 0 ± 5. 5. Click the �NEXT� button.
C-12 Filter
Brightness Box CAMERA BODY Power Source
Personal Computer
5
1. When the message on the right appears, Set the Brightness Box to EV15 and attach the ND-8 Filter while setting the C-12 Filter between the lens. 2. Click the �Check� button. 3. Check the Brightness level if it is within 0 ± 5. * If not, calibrate the Brightness Box until it becomes within 0 ± 5. 4. Click the �NEXT� button.
6
When the message on the right appears go to 7.
7
1. Attach the ND-4 Filters between the Lens and the Color Viewer. 2. Place the camera so that the lens is set against the center part of the Color Viewer. 3. Click the �ADJUST� button.