|
|
|
Who's Online
There currently are 5880 guests online. |
|
Categories
|
|
Information
|
|
Featured Product
|
|
|
 |
|
|
There are currently no product reviews.
 ;
This was a hard to find manual. When I did find it , some sites wanted way too much for the file.
Owner-manual .com had it for a really reasonable price. Not only that but it was sent very quickly and was a quality scanned document, unlike some others I purchased from a different site.
Good job guys!!
Larry
 ;
Fast and courteous service. Product delivered as described. Thank you.
 ;
Last week I bought a second hand Panasonic AG-7500 SVHS Hi-Fi Video Cassette Recorder. It is a professional machine with many video and audio options. I feared it would be a huge quest to find a manual. I was delighted when I found owner-manuals.com. After payment I received the file to download the next day already. The quality is great. I am very happy. Thanks!
 ;
The owner's manual/operating instructions that I purchased was the original factory document and it was in at least three and maybe more languages. I no longer have it because I sold the tape recorder and included the owner's manual/operating instructions and a service/repair manual that I bought on ebay for the new owner.
 ;
This manual is very useful. Because pioneer sx-q180 is unhandy to use without manual.
Playing with Different Tones
1
Simultaneously press the TONE buttons of the two tones that you want to layer.
Example: Press GRAND PIANO 1 button and STRINGS button at the same time.
Assigning Different Tones to the Left and Right Sides of the Keyboard
You can assign different tones to keys on the left side and the right side of the keyboard.
Split Point Low Range High Range
� If the layer tone is a variation tone, the indicator lamp above the VARIATION button will light.
STRINGS
GRAND PIANO 1
1
GRAND PIANO 1 STRINGS
Press the TONE button of the tone you want to select for the high (right) range.
Example: GRAND PIANO 1
� The tones are now layered.
Â¥
2 3
Press the SPLIT button.
� This causes the SPLIT indicator lamp to light.
2
After you are finished using the layered tones, press the one of the TONE buttons again to unlayer them.
Press the TONE button of the tone you want to select for the low (left) range.
� The keyboard is now split between the two tones. Example: STRINGS
NOTE
� Note that you cannot layer the main tone and variation tone assigned to the same TONE button.
4
Adjusting the Volume Balance between Two Layered Tones
After you are finished using the split keyboard, press the SPLIT button again to unsplit it.
� This causes the SPLIT indicator lamp to go out.
1
While holding down the FUNCTION button, use the keyboard keys shown below to adjust the volume of the layered tones.
Specifying the Keyboard Tone Split Point
1
While holding down the SPLIT button, press the keyboard key where you want the left limit of the high range (right) tone to be.
Left limit of the high range Flash Low range High range
L C1
L C2
L C3
L C4
L C5
L C6
L C7
L C8
Initial default (Center)
£
Volume of the layered tone
Volume of the main tone
� To return the volume setting to its initial default, hold down the FUNCTION button and press both of the keys at the same time.
NOTE
� The split point setting also controls the point where the keyboard splits between the accompaniment keyboard (pages E-14, 15) and the melody keyboard. Moving the split point also affects the sizes of the accompaniment keyboard and the melody keyboard.
407A-E-011A
E-9
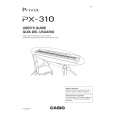
 $4.99 PX-310 CASIO
User Guide It's a complete guide ( also known as operating manual or owner's manual), and it's in PDF format. A…
|
|
 |
> |
|
