|
|
|
Categories
|
|
Information
|
|
Featured Product
|
|
|
 |
|
|
There are currently no product reviews.
 ;
I found my Clarion VRX8370R in the Camper I bought and I wasn't able for month to understand it.
The Owner Manual was perfect and just what I was searching for.
Thank you.
Leonardo
 ;
Very good copy of Manual, clear and easy to print off, arrived very promptly and reasonably priced.
Thanks, I will use you again.
 ;
Zeer duidelijke afdrukken op A4-formaat , zeer uitgebreide handleiding . Pluspunt ,zeer snelle
respons van jullie , binnen de 24h . Top !!!
 ;
I AM HIGHLY IMPRESSED BY THE EASE OF USE OF THIS DOWNLOAD SERVICE. INSTRUCTIONS ARE CLEAR AND SIMPLE TO FOLLOW....EVEN BY TECHNOPHOBES SUCH AS MYSELF. THE EMAILS POINT YOU IN THE RIGHT DIRECTION...ITS SO EASY PEASY. THE DOWNLOAD CHOICE OF USER MANUALS IS EXTENSIVE AND I COULD NOT FIND A CHEAPER OR MORE EFFICIENT SERVICE ON THE INTERNET. I COULD NOT HAVE MADE A BETTER CHOICE OF INFORMATION PROVIDER. SHOULD I EVER NEED ANOTHER USER MANUAL, THEN THIS IS THE FIRST CHOICE SITE. COULD NOT BE BETTER PLEASED!!!!!!!...MANY THANXES FROM JIM BURNS
 ;
I was impressed with the quality of service (frequent e-mails to let you know the status of your order), and the speed at which the download became available. The manual was a life saver and was not easy to track down. Thank you for such an excellent service.
5
Adjust the recording level, if necessary. (ANALOG IN ONLY)
For details, see �Adjusting the Recording Level� below.
Auto/Manual Track Increment
Press LEVEL SYNC to select how tracks will be numbered on the recorded disc.
6 7
Press H . Start playing the sound source you want to record.
To pause recording Press X . To resume recording, press the button again or press H . Note
Whenever you pause recording, a new track number is added. For example, if you paused recording while recording on track 4, the track number increases by one on track 5 and recording continues on the new track when recording is resumed.
LEVEL SYNC
To stop recording Press x . �BUSY�, and then �UPDATE� appear while updating the information of the disc before stopping the recording. Notes
� You cannot operate the DVD/CD player section while the deck is recording or standing by for recording with �OPTICAL� or �ANALOG� selected with the INPUT button. � If you press the REC button during recording, you can add a track (The track must be longer than 4 seconds). � Press X when the recorder is in standby for recording to add a silent (around 2 seconds) before a song you are recording. The recorder automatically enters standby again. � This recorder uses the Serial Copy Management System(SCMS), which allows only first-generation digital copies to be made of premastered software via the recorder�s digital input. Therefore you may not be able to record a CD-R or CD-RW digitally through OPTICAL IN, depending on the content being record.
� The Auto mode will add track numbers automatically, in one of two ways. When track data is present from a digital recording, it will be carried over to the new copy disc. Thus, when the CD being played moves from one track to the next track, the copy disc will also increase the track number by one. � In the Auto mode for recordings from an analog source or a digital source with no track data, the track number will be increased when the recorder receives silence for 3 seconds. After 20 seconds of silence, the recording will automatically stop. � To activate the Auto mode, press the LEVEL SYNC once and note that the L.SYNC goes out. In that mode for either digital or analog recordings, you must add track numbers manually by pressing REC z when you wish to increase the track number. � The Digital In source with track data will be recorded not concerned with LEVEL SYNCH ON/OFF according to track data. � When the power is turned on, LEVEL SYNC is activated automatically and the L.SYNC indicator will light in the front panel display.
49US
Recording on CD-R
*RCD-W7V.p65_46-53
49
12/9/01, 6:10 PM
RCD-W7V 4-236-407-11(1)
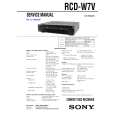
 $4.99 RCDW7V SONY
Service Manual Complete service manual in digital format (PDF File). Service manuals usually contains circuit diagr…
|
|
 |
> |
|
