|
|
|
Who's Online
There currently are 5899 guests online. |
|
Categories
|
|
Information
|
|
Featured Product
|
|
|
 |
|
|
There are currently no product reviews.
 ;
Thank´s for your help, I already recived these manual from you
;
Thank you for your manual It has the basic things to and i use the Oszi for Longer Time.
THX
;
Actually, I was looking for this information for 3 years!...now thanks to you, the manual is on my hands and of great help, cause I understand now where I was doing wrong connections and wires...excellent, I'll be back to you if in need, thank you.
 ;
This manual covers the main equipment features only. While it also includes the procedure for saving and loading from the now long obsolete memory cards it does not mention the how to operate with the optional floppy drive interface so I am still at a loss about how to use this! Note that there is a separate manual covering the MIDI interface and programming via the keyboard, not included in this download. You will also need to get hold of this if you want to use the MIDI interface properly. Basically there is little difference between this manual and the free to download manual for the similar PR60 model.
;
Good list of manuals. I found a very rare one and easily get. Should be promptly to download, as we must to wait hours even after confirmed payment.
To use the VCR after setting the timer To use the VCR before a timer recording begins, just press ?/1. The indicator disappears from the display window and the VCR switches on. Remember to press ?/1 to reset the VCR to the timer recording standby mode after using the VCR. You can also do the following tasks while the VCR is recording: � � � � Reset the counter (page 43). Display tape information on the TV screen (page 45). Check the timer settings (page 61). Watch another TV program (page 46).
To lock the VCR after setting the timer (Child Lock) When the VCR is turned on, hold down ?/1 POWER on the VCR until the indicator appears in the display window. The VCR turns off and the - indicator remains lit. The VCR will not work except for timer recordings. To unlock the VCR, hold down ?/1 POWER on the VCR until the - indicator disappears from the display window. The VCR is unlocked and turns on. To stop timer recording while the VCR is locked, press x STOP. The recording stops and the VCR is unlocked. To set the clock
1 Turn DIAL TIMER so that �CLOCK� appears in the display window. 2 Press DIAL TIMER. �MONTH� appears in the display window. 3 Turn DIAL TIMER to set the month. 4 Press DIAL TIMER. display window. �DAY� appears in the 5 Turn and press DIAL TIMER to set the day and then the year. After you set the year, �CLOCK� appears in the display window again. 6 Turn and press DIAL TIMER to set the hour and minute. 7 When you have finished setting the time, press DIAL TIMER to set the clock.
Tips � To cancel a Dial Timer setting, press x STOP on the VCR while you are making the setting. � The program is recorded in the current tape speed. To change the tape speed, press SP/EP before you complete the setting in step 9. � When you are recording a program in the SP mode and the remaining tape becomes shorter than the recording time, the tape speed is automatically changed to the EP mode. Note that some noise will appear on the picture when the tape speed is changed. If you want to keep the tape speed, set AUTO TAPE SPEED to OFF in the ADVANCED OPTIONS menu (page 68). � To check, change, or cancel the program setting, see �Checking/changing/canceling timer settings� (page 61).
50
Recording TV programs using the Dial Timer (SLV-N60/AX20 only)
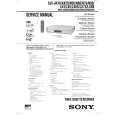 $4.99 SLVN50 SONY
Service Manual Complete service manual in digital format (PDF File). Service manuals usually contains circuit diagr…
|
|
|
> |
|