|
|
|
Who's Online
There currently are 6043 guests online. |
|
Categories
|
|
Information
|
|
Featured Product
|
|
|
 |
|
|
There are currently no product reviews.
 ;
The Owner's manual was very helpful. The WEGA is about 35 years old and needed repair.
Your Website is pretty good und easily to handle.
Thank You
Carl-W. Lohmann
 ;
Perfect. Very good service and very good scanning quality. All sheets are very legible. Thank's
 ;
My first manual from Owner-Manuals.com but not the last! I am very satisfied with the easy ordering and promt delivery of a manual I did not find anywhere else.
 ;
This manual is very helpfull to use the Power Supply. All technical information has been available.
For service use the circuit diagrams are very good.
Thanks .
 ;
Very comprehensive document which is a must-have for any Satellit 2100 owner whose set up is somewhat intricate. Due to the bad quality of the pictures that are rather dark and a bit blurred I gave 4-star feedback.
Setting the Timer
You can program a built-in timer to let the tuner automatically turn on at a predetermined "On Time" and shift back to Standby mode at a predetermined "Off Time," thus there is no chance that you miss your favorite program. Adjust the clock before setting the timer.
1
1 Press the TIME SET button twice so the display reads ON-TIME.
2
2 Press the MEMORY/SET button.
The hours start blinking.
3 Enter the number of hours by pressing the TIME buttons.
4 Press the MEMORY/SET button.
3
The minutes start blinking.
5 Enter the number of minutes by pressing the TIME buttons.
4
6 Press the MEMORY/SET button.
7 Press the TIME SET button three times so the display reads OFF-TIME. 8 Repeat steps 2 to 6.
5
9 When you have set up both ON-TIME and OFF-TIME, press the TIMER button.
6
A red indication, TIMER, appears in the lower left corner of the display to indicate that the tuner is put under the control of the timer.
7
To check the current timer settings, press the TIME SET button twice, then press the MEMORY/SET button. If you are happy with the current ON-TIME setting, press the TIME SET button once, followed by the MEMORY/SET button, to check the OFF-TIME setting. To release the tuner from the control of the timer, simply press the TIMER button to turn off the TIMER indicator in the display.
9
26
ENGLISH
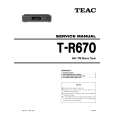
 $4.99 T-R670 TEAC
Service Manual Complete service manual in digital format (PDF File). Service manuals usually contains circuit diagr…
|
|
 |
> |
|
