|
|
|
Who's Online
There currently are 6043 guests online. |
|
Categories
|
|
Information
|
|
Featured Product
|
|
|
 |
|
|
There are currently no product reviews.
 ;
Great tape deck manual!
I'm very positively surprised, because it is a very long manual, lot of pages, drawings, diagrams, description of how to make the alignment and adjustment procedures.
It is as good as the old "Naka" manuals from the 1970's - if somebody have seen them, they know what I mean by that.
I recommend to buy this very much !
;
I am a vintage hifi collector. No way to fix that device without the appropriate service manual...thanks to your site I got it and every thing is easier now. I got the manual right after ordering: fast cheap accurate ... thank you
;
Wonderful job clear. Qick fantastic. These people are really good. If even a problem arise they are wonderful assisting you. These scheme is so net despite this is a very old TV. Thank you for everything!!!!!!!!
;
Detailed schematic diagram, manual for professionals
;
Good service manual,exploded view,adjusment and test point locations,head alignment,mechanical checks and adjusments,all perfect.
UX-510U/UX-510C/UX-500U UX-500C/FO-1460U
Loading paper
1. Insert the paper tray into the fax if not yet installed.
Installing the imaging film
1. Press the release marked OPEN and open the print compartment cover.
2. Insert two of the gears into the ends of the spool with film.
2. Remove the paper cover if it is on the tray. (For legal paper, flip up the tray externder.) 3. Hold the empty spool so that the end with only one slot is on the left, and lower the spools into the printing compartment so that the gears fit into the slots on each side of the compartment.
3. Pull the paper release plate toward you. o If any paper remains in the tray, take it out and combine it into a single stack with the new paper.
4. Cut the band holding the spools together with scissors, and remove it. Insert the remaining gear into the right end of the empty spool and the flange into the left end of the empty spool.
4. Insert the stack of paper into the tray. Replace the tray cover and then push the paper release plate back down.
5. Pull the empty spool toward the back of the compartment, unwinding the leader from the spool with film. Insert the empty spool into the compartment so that gear and spool fit into the slots on each side of the compartment.
LEGAL LETTER
6. Wind the film slightly to remove slack and then close the printer compartment cover.
5. Press the following sequence of keys:
FUNCTION
6
STOP
Press "1" if you loaded letter size paper, or "2" if you loaded legal size paper. When finished, press:
7. If you replaced the film. press the following sequence of keys (this is not necessary for the sample film included with the fax):
FUNCTION
START
6
1 � 10
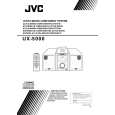 $4.99 UX500 SHARP
Owner's Manual Complete owner's manual in digital format. The manual will be available for download as PDF file aft…
|
|
|
> |
|