|
|
|
Categories
|
|
Information
|
|
Featured Product
|
|
|
 |
|
|
There are currently no product reviews.
 ;
Excellant!!! Very quick and easy....Best $4.99 I have spent in a very long time..
I highly recommend this.
 ;
Thanks so much for the Owner's manual for my Sony PS - FL1. I had purchased the turntable off of eBay. It came in and looked great. Packed well and appeared to be great. I balanced and aligned the tone are and hooked it up. When trying to play a record the tone are would move to the right place and just before it would drop to play it moved back off the edge of the record before touching down. I searched the net for an answer to this issue. No luck. Then I purchased the owners manual and sure enough there was a place to adjust where the stylus touched down. That adjustment solved the problem and saved me a $35 feet to have the player checked out. The manual is well written and easy to understand. It is a must have for anyone with this front loading Sony turntable.
 ;
Some years back I pruchased a Sansui G-9000. I had it cleaned up and a problem with the left channel repaired. When I got it back I hooked it up to my tape decks, turn tables, TV and it played great. The only thing I was not really satisfied with was the performance of my Graphic Equalizer. I purchased this owner's manual had poured myself a cup of coffee. The manual is well organized and written in plain language. It also contained the solution to my dissatisfaction. By using the preamp connections coupled I was able to run everything through my graphic equalizer and now enjoy the full potential of my complete system.
 ;
An excellent service for the price, however, it would also have been handy if the troubleshooter pages were included. The manual is only sent in the language of your country, thus it looks as though there are some pages missing. Otherwise highly recommended.
 ;
I am happy to get a rare TECHNICS SH-9090 Owner's Manual by PDF in clear copy.
Recording
IMPORTANT:
� It should be noted that it may be unlawful to re-record pre-recorded tapes, records, or discs without the consent of the owner of copyright in the sound or video recording, broadcast or cable program and in any literary, dramatic, musical, or artistic content embodied therein. � The recording level is automatically set correctly, so it is not affected by the volume control. Thus, during recording you can adjust the sound you are actually listening to without affecting the recording level. While recording, you can hear sound modes and/or the HBS sound effect through the speakers. However, the sound is recorded without these effects (see page 9). If recordings you have made have excessive noise or static, the unit may be too close to a TV. Increase the distance between the TV and the unit. Use only type I normal tapes for recording. The use of tapes longer than 120 minutes is not recommended, since characteristic deterioration may occur and these tapes easily jam in the pinchroller and the capstan.
Recording Tapes
1 Load a recordable tape into the tape deck.
Insert a tape with the open side down and the side to be recorded facing out from the unit.
2 Press CD/RANDOM or TUNER/BAND to select the desired recording source. 3 Prepare the source.
� For synchronous recording of a CD
RANDOM
BAND
CD
or
TUNER
�
�
� �
Load the disc (see page 13). � To start recording from the desired track, select the track by pressing 4 or ¢ repeatedly in stop mode. � To start recording from the desired point on a disc, play the disc and pause at the desired point by pressing 6. � For recording from the radio Tune in the desired station (see page 10).
To protect your recording
Cassettes have two small tabs on the back to prevent unexpected erasure or re-recording. To protect your recording, remove these tabs. To re-record on a protected tape, cover the holes with adhesive tape.
4 Press REC.
�REC� is displayed. The TAPE REC indicator and �8� light up and the recording direction indicator starts blinking.
REC
5 Press 6 for recording.
Recording starts. �8� goes off. The TAPE REC indicator remains on the display. When recording a CD, the CD SYNC indicator also lights up. To stop recording, press 7. The selected recording source continues playing.
PLAY/PAUSE
� During recording, it is not possible to pause or listen to another source. �REC ON� appears on the display. � Recording continues to the end of the tape until you press 7 even after playback of the CD has finished.
Using the BEAT CUT function
When recording an MW broadcast, beats may occur. If this happens, press BEAT CUT on the remote control to select the better beat-cut position, �BEAT 01� or �BEAT 02�.
� 16 �
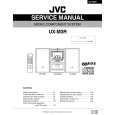
 $4.99 UXM3R JVC
Service Manual Complete service manual in digital format (PDF File). Service manuals usually contains circuit diagr…
|
|
 |
> |
|
