|
|
|
Categories
|
|
Information
|
|
Featured Product
|
|
|
 |
|
|
There are currently no product reviews.
 ;
Complete service manual, was very helpful in repairing this tapedeck.Thanks.
;
The service manual was a copy of the original from Wirlpool. The quality was good, all neccecary information was available including the service-codenumbers, so I could order the right part to be replaced for repair.
Downloding was no probem after the payment.
Thanks for the service!
;
Good,readable manual. I found other manuals that were not readable when it came to part ID, but the one downloaded from owner-manual.com was better than expected. I will do buisness with owner-manual.com again.
;
Service Manual that I received was very helpful to me. Thank you.
;
The manual is well organized and is easy to read. The chapters are following normal way to proceed.
Alignment and Adjustment
5-3 Head Switching Point Adjustment
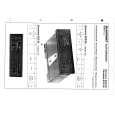
1) Playback the alignment tape. 2) Monmently short-circuit the test point on Main PCB with pincers to set the adjustment mode. (See Fig. 5-2 ) 3) Press the �SP/SLP� button of remote control then adjustment is operated automatically. (See Fig. 5-1) 4) Turn the Power off.
5-4 NVRAM Option Setting
1) NVRAM Option is adjusted at production line basically. 2) In case Micom (IC601) and NVRAM (IC603 ; EEPROM) is replaced, be sure to set the corresponding ooption number of the repaired model. (If the option is not set, the unit is not operated.) 1) Monmently short-circuit the test point on Main PCB with pincers to set the adjustment mode. (See Fig. 5-2 ) 2) Press the �PROG.� button of remote control about 5 seconds then option setting display is appeared. (See Fig. 5-14) 3) Select the option number (See Table 5-2) of corresponding model with �FF� and �REW� button of remote control. 4) If selecting the option number is completed, press the �PLAY� button of remote control. (If �PLAY� button is pressed, the selected number is changes reversed color. ; See Fig. 5-14) 5) Press the �ENTER� button of remote control again to store the option number. (�SAVE� is displayed for a second as shown Fig. 5-15 this setting is completed.) 6) Turn the Power off.
01 02 03 04 05 06 07 08 09 10 11 12 13 14 15 16 17 18 19 20 21 22 23 24
01 02 03 04 05 06 07 08 09 10 11 12 13 14 15 16 17 18 19 20 21 22 23 24
ENTER : SAVE
Fig. 5-14 <Table 5-2>
MODEL W-522 OPTION NUMBER 2, 3, 4, 5, 6, 7, 10, 13, 16, 21, 22, 27, 28
ENTER : SAVE
Fig. 5-15
5-8
Toshiba
|
|
|
> |
|