|
|
|
Who's Online
There currently are 5913 guests and
16 members online. |
|
Categories
|
|
Information
|
|
Featured Product
|
|
|
 |
|
|
There are currently no product reviews.
 ;
as always, rapid and efficient, very good and clear prints
details clearly visible keep going this way!!!!!!
 ;
I expect a wonderful result as alaways!!!!!!
Usually is much faster....
 ;
Wow very wonderful and clear!!!! I will always trust them
 ;
Providing the manual works fine, quickly and without any problems for an acceptable price. After printing the service manual it took me only a short time to repair my carradio from Clarion. Thank You! Greetings from Heiko
 ;
I was searching a way to modify the original phono-in entry (for connection of vynil disc player, with RIAA equalization) to a line-in entry (for connection of modern analog entries, eg. ipod, mp3player).
This service manual gave me the correct hints.
It contains very useful infos for repairing and modifing the hi-fi, such as disassembling instructions, block diagrams, schematic diagrams, PCB prints, replacement parts list.
Very good!
GENERAL SPEAKER DISASSEMBLY INSTRUCTIONS (FOR REFERENCE)
Type.1 Insert a flat-bladed screwdriver into the position indicated by the arrows and remove the panel. Remove the screws of each speaker unit and then remove the speaker units. Type.4
TOOLS
1 Plastic head hammer 2 (() flat head screwdriver 3 Cut chisel
1
2
3
How to Remove the PANEL, FR
Type.2 Remove the grill frame and four pieces of rubber caps by pulling out with a flat-bladed screwdriver. Remove the screws from hole where installed rubber caps. Insert a flat-bladed screwdriver into the position indicated by the arrows and remove the panel. Remove the screws of each speaker unit and then remove the speaker units. 1. Insert the (() flat head screwdriver tip into the gap between the PANEL, FR and the PANEL, SPKR. Tap the head of the (() flat head screwdriver with the plastic hammer head, and create the clearance as shown in Fig-1. Insert the cut chisel in the clearance, and tap the head of the cut chisel with plastic hammer as shown in Fig-2, to remove the PANEL, FR. Place the speaker horizontally. Tap head of the cut chisel with plastic hammer as shown in Fig-3, and remove the PANEL, FR completely.
2.
3.
Type.3 Insert a flat-bladed screwdriver into the position indicated by the arrows and remove the panel. Turn the speaker unit to counterclockwise direction while inserting a flat-bladed screwdriver into one of the hollows around speaker unit, and then remove the speaker unit. After replacing the speaker unit, install it turning to clockwise direction until "click" sound comes out.
Fig-1
Fig-2
Fig-3
How to Attach the PANEL, FR
Attach the PANEL, FR to the PANEL, SPKR. Tap the four corners of the PANEL, FR with the plastic hammer to fit the PANEL, FR into the PANEL, SPKR completely.
� 34 �
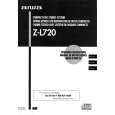
 $4.99 ZL720 AIWA
Owner's Manual Complete owner's manual in digital format. The manual will be available for download as PDF file aft…
|
|
 |
> |
|
